
How to Configure Hostinger’s Webmail in Your Iphone?
1-Click Settings on your iPhone’s Main Screen as shown below. Depending on your iPhone version, the screen may look slightly different.

2- Click “Mail” which is approximately in the middle of the Settings area, as highlighted below.

3- Click “Add Mail Account”

4- Click “Other” which is the last option at the bottom of your iPhone screen.

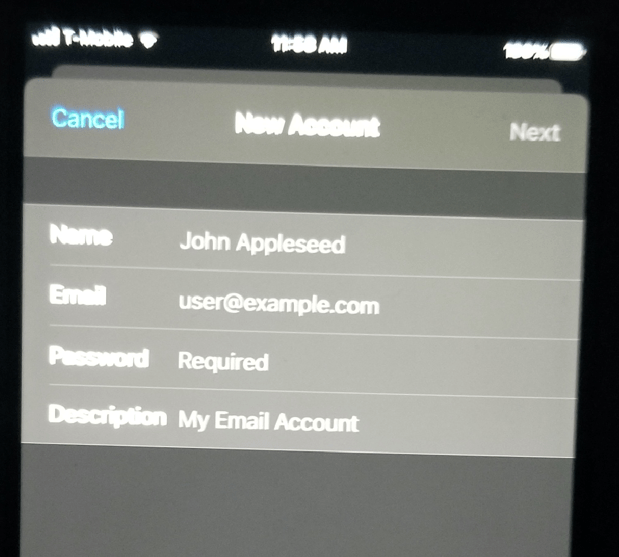
5- A blank form to enter your email details appears like the screenshot below this text.
Enter Your Name as you want it to be displayed when sending messages. Your Hostinger email address is usually yourname@domain.com, and Hostinger’s webmail password was given to you at the time of your Hostinger account setup. Notice that the webmail password is NOT the same as your Gmail or current iPhone’s iCloud password. If you are not sure which is your webmail password in Hostinger, notify your Website administrator or IT support before proceeding. Also, the Description field is the Name of your inbox so you can correctly separate it from the rest of your emails. This is the name that will be displayed in Step 5.
6- Following the screenshot below, enter the following information under “Incoming Mail Server”:
Hostname: pop.hostinger.com
User name: Your Email (for example max@excelrapido.com)
Password: Your webmail password (not your Gmail or iCloud)
Type under Outgoing Mail Server: Smtp.hostinger.com
Username: Your email
Password: Your webmail Password
Click “Save” in the upper right-hand corner. Without saving the changes will not take effect.

7- Make sure the account is set up as POP on the Tab above. Look at the screenshot below and make sure your email is typed correctly as well.

8- The screen displaying all of your settings appears in the next section, if all looks good click“Next”

9- Make sure that you check Emails on Your “Mail” icon of your iPhone and Not your Gmail account. Remember that we are adding your Email account in Hostinger directly on your iPhone, and below “All Inboxes” you should see the new Hostinger Inbox as well.
The inbox should appear as shown (the Inbox name is the Name that you entered under “Description” back on step 5. To finalize your Hostinger Webmail iPhone Setup, Send a test email to a different account or person and make sure that you receive the replies from that account.
If for any reason you don’t receive it, check for any typos on the Incoming and Outgoing server, your e-mail, or any mismatched passwords. As a last resort, you can go over all of the steps again but just make sure that you name the account (step 5) with a similar but not identical name (for example My company 1, or New My company name). If you need technical support you can also fill out the contact form here and we will help as well. Hope this tutorial was helpful and make sure to subscribe to our YouTube channel with more tips here

hostinger email setup iphone
hostinger imap settings
hostinger email setup gmail
hostinger email setup outlook
cant add email to iphone
hostinger email setup android
hostinger smtp configuration
hostinger webmail app